SDK Creation Overview
Stages of availability
✅ GA: Interface is stable. Has full support for all available features. Support subscribes to SLAs.
🔵 Beta: Interface mostly stable. May not support all features (see language page for details). Support subscribes to SLAs.
🏗️ Alpha: Interface not yet stable. All feature support is experimental. Support does not subscribe to SLAs.
Prerequisites
- The Speakeasy CLI installed. With hombrew you can install this with:
brew install speakeasy-api/tap/speakeasy
Script (macOS and Linux)
curl -fsSL https://raw.githubusercontent.com/speakeasy-api/speakeasy/main/install.sh | sh
Chocolatey (Windows)
choco install speakeasy
Manual Installation
Download the latest release for your platform from the releases page (opens in a new tab), extract, and add the binary to your path.
- Your API specification in one of our supported formats:
| Spec Format | Supported |
|---|---|
| OpenAPI 3.0 | ✅ |
| OpenAPI 3.1 | ✅ |
| JSON Schema | ✅ |
| Postman Collections | 🔜 |
TIP
If your spec is in an unsupported format, you can use one of the following tools to convert it to a supported format:
- Swagger 2.0 -> OpenAPI 3.0 (opens in a new tab): Edit > Convert to OpenAPI 3.0
- Postman -> OpenAPI 3.0 (opens in a new tab)
Interactive SDK generation with CLI Quickstart
For those who are generating an SDK for the first time with Speakeasy, we recommend starting with speakeasy quickstart. If you don't yet have the CLI installed please run brew install speakeasy-api/tap/speakeasy to install it.
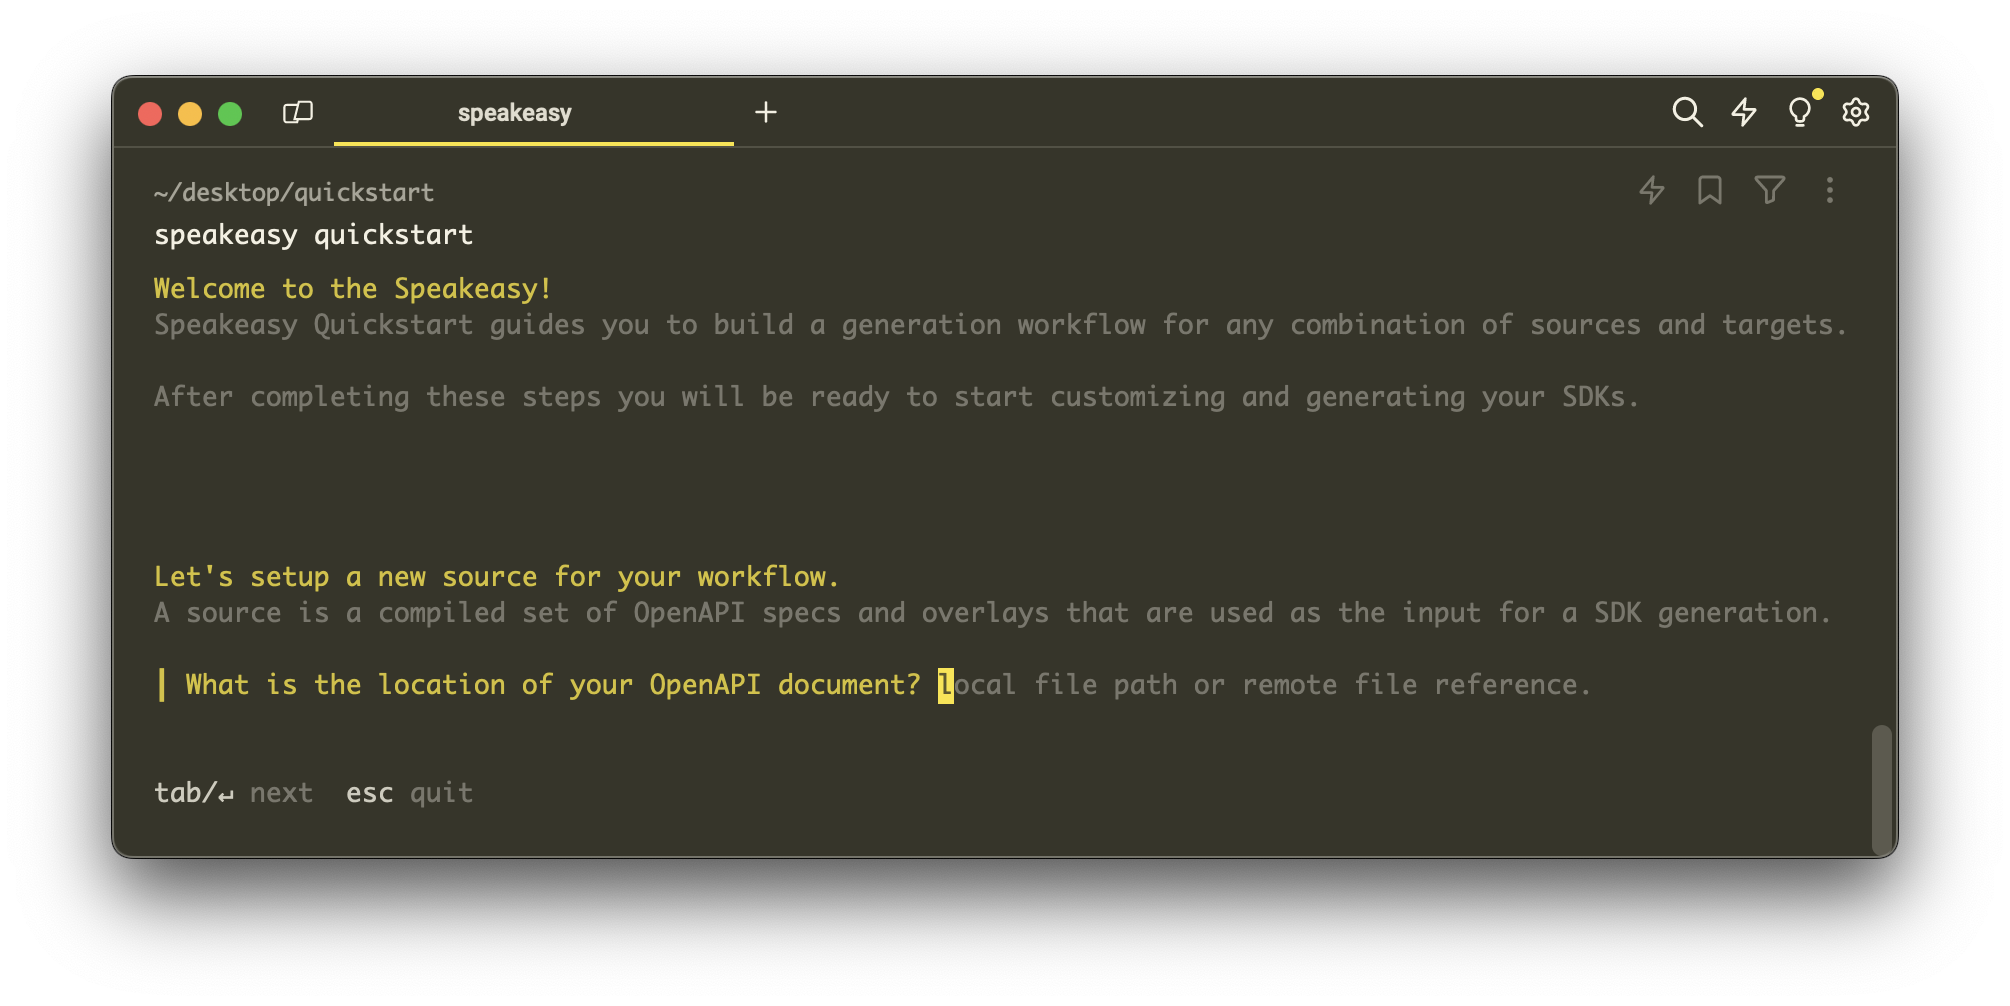
To kick off the quickstart process, open your terminal and enter the following command:
speakeasy quickstart
This command initiates an interactive session that will guide you through the necessary steps to generate your SDK. You maybe prompted to create a workspace on our dashboard (opens in a new tab) if you haven't done so already.
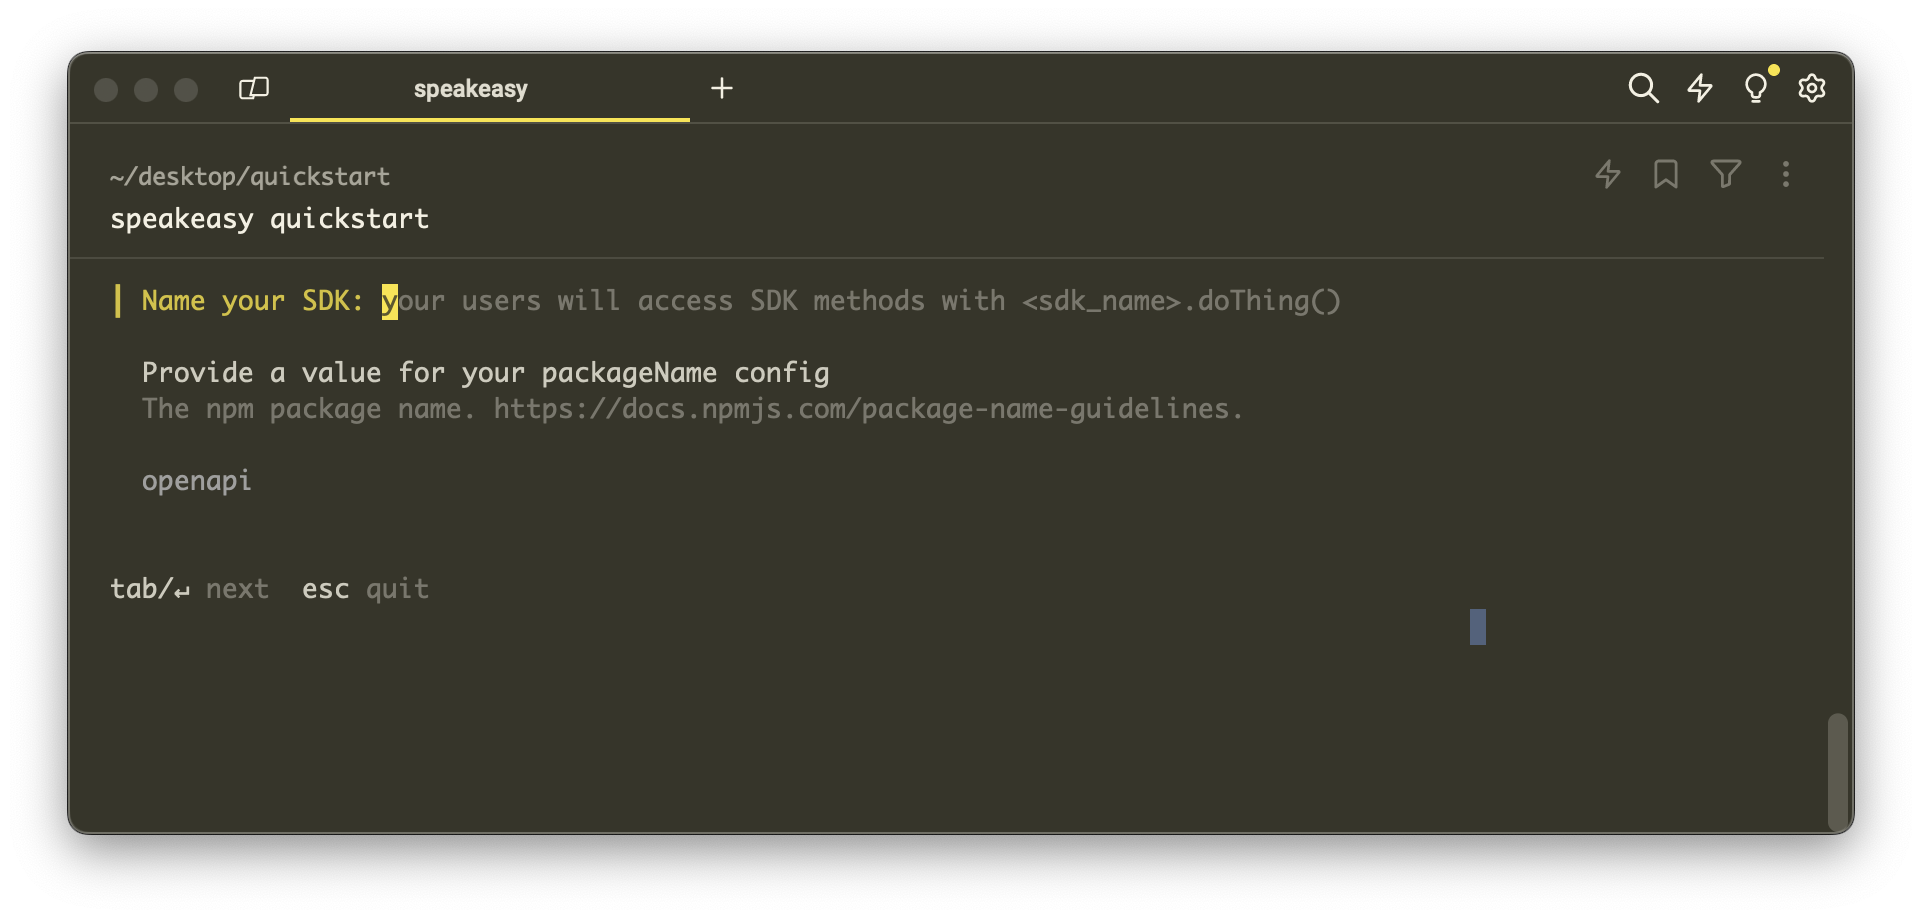
You will be prompted to select the language for your SDK:

Enter other required parameters specific to your SDK as prompted:
Upon receiving all necessary inputs, Speakeasy will proceed to validate your specifications and generate the SDK. This will execute speakeasy run to validate, generate, compile and setup your SDK. If successful, you'll see a confirmation message along with details of the generated SDK:
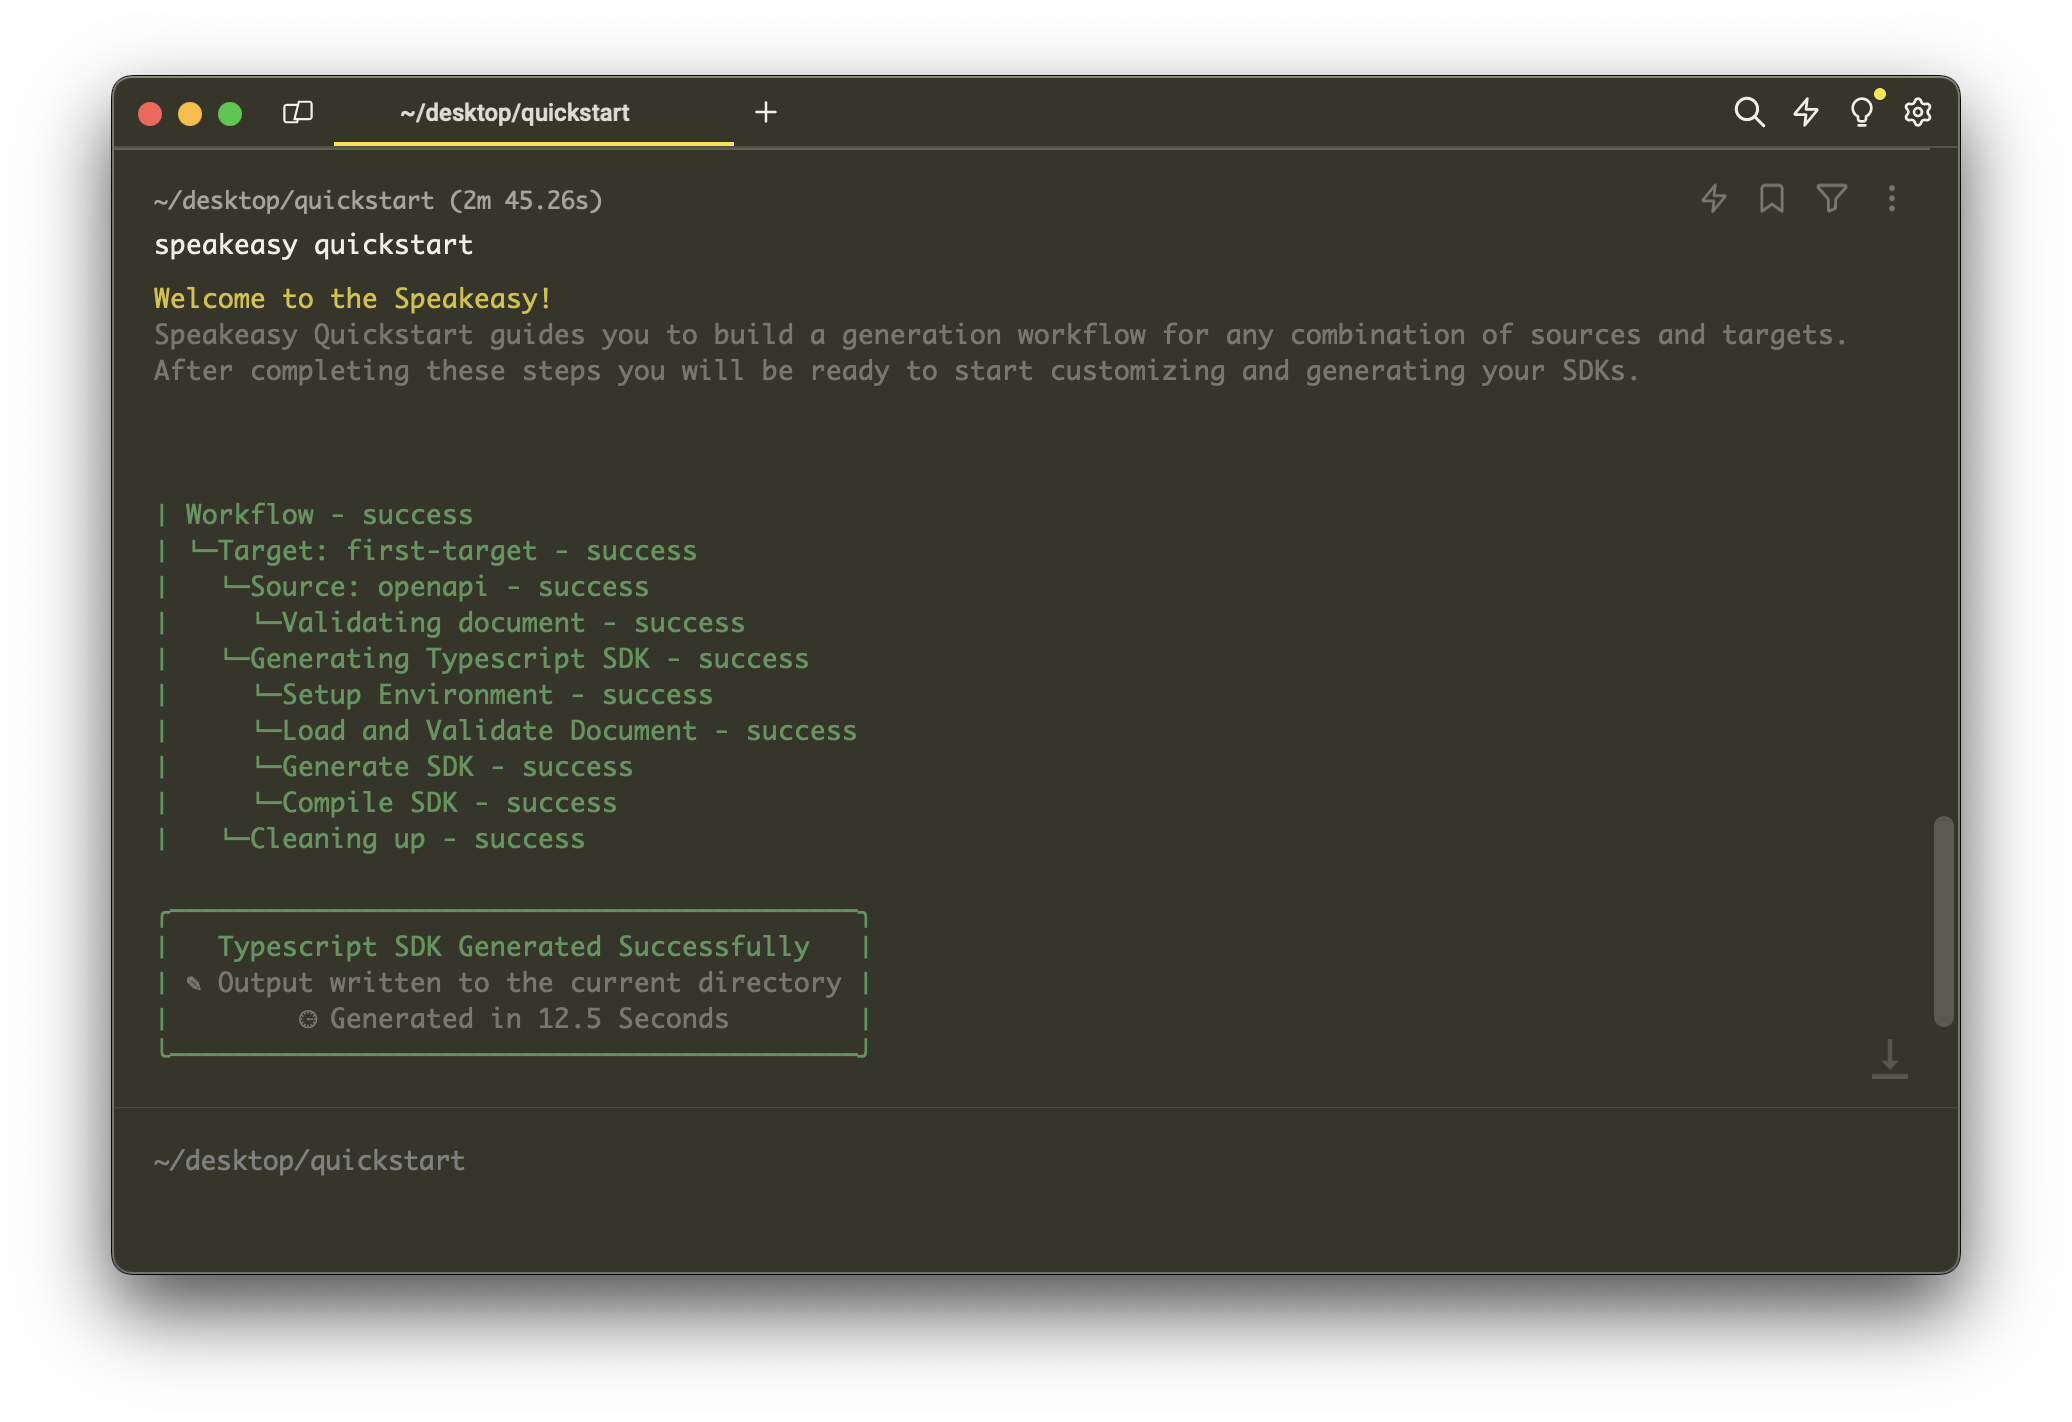
If you make any further changes to your OpenAPI document or SDK configuration, you can re-run the speakeasy run command to regenerate your SDK.
Finally consider setting up your SDK on Github for a fully managed experience. See our Github setup guide here.
Traditional SDK Generation
Experienced users or those looking to integrate SDK generation into scripts may prefer a non-interactive approach by specifying all necessary parameters in one command. Please note this method requires you to
string together your own workflow to validate, generate, compile and publish your SDK. In most cases we reccomending using speakeasy quickstart and run as shown in the above section
speakeasy generate sdk --out <output_directory> --schema <specification_path_or_url> [options]
Required Parameters:
--out: Destination for the generated SDK.--schema: Path or URL to your API spec.
Additional Options
-y, --auto-yes auto answer yes to all prompts -d, --debug enable writing debug files with broken code -H, --header string header key to use if authentication is required for downloading schema from remote URL -h, --help help for sdk -i, --installationURL string the language specific installation URL for installation instructions if the SDK is not published to a package manager -l, --lang string language to generate sdk for (available options: [csharp, go, java, php, python, ruby, swift, terraform, typescript, unity]) (default "go") -p, --published whether the SDK is published to a package manager or not, determines the type of installation instructions to generate -r, --repo string the repository URL for the SDK, if the published (-p) flag isn't used this will be used to generate installation instructions -b, --repo-subdir string the subdirectory of the repository where the SDK is located in the repo, helps with documentation generation --token string token value to use if authentication is required for downloading schema from remote URL
Next Step: Customize Your SDK
Generating SDKs is the first step, but there are several optimizations you can make to improve the quality of your SDKs. We recommend you check out the following guide on customizing your SDKs.