Warning
This section outlines an advanced setup process that may not be suitable for all users. For most use cases, we recommend adopting the simpler approach of a single SDK per GitHub repository. To setup a single SDK per Github see our SDK quickstart.
What is a Monorepo?
A monorepo is a unified repository containing multiple SDKs, each corresponding to a unique OpenAPI specification. This approach offers a centralized location for discovering available SDKs while allowing for the independent download and management of each SDK as needed. Each SDK resides in its own subfolder, and can be made complete with individual GitHub workflows for regeneration and release processes.
Repository Structure
The monorepo's structure is designed for scalability and easy navigation. In our example, we will discuss two SDKs: ServiceA and ServiceB, each found in their respective subfolders. The typical structure of such a monorepo is as follows:
.github/workflows/ - serviceA_generate.yaml # Github Workflow for generating the ServiceA SDK, generated by speakeasy cli - serviceA_release.yaml # Github Workflow for releasing and publishing the ServiceA SDK, generated by speakeasy cli - serviceB_generate.yaml # Github Workflow for generating the ServiceB SDK, generated by speakeasy cli - serviceB_release.yaml # Github Workflow for releasing and publishing the ServiceB SDK, generated by speakeasy cli.speakeasy/workflow.yaml # Speakeasy workflow file that dictates mapping of sources (eg: openapi docs) and targets (eg: language sdks) to generateserviceA/ - gen.yaml # Generation config for the ServiceA SDKserviceB/ - gen.yaml # Generation config for the ServiceB SDK
This structure can be expanded to accommodate any number of SDKs.
Creating Your SDK Monorepo
You have two options for creating your SDK monorepo with Speakeasy and GitHub: starting from a template or building from scratch. For the purpose of this guide, we will use an example with two APIs, one for lending and one for accounting.
Option 1: Use a Template
Start by cloning the template-sdk-monorepo repository (opens in a new tab) using the "Use template" button on GitHub, and name it as you see fit.
Option 2: Build from Scratch
- Create a new repository on GitHub and clone it down locally with
git clone <repo-url>. - Mimic the directory structure shown above. This can be achieved easily by following the interactive CLI commands below
a. Install Speakeasy CLI
b. Use quickstart to boostrap the repository.
This will create the necessary directories and files for you to start generating SDKs.
speakeasy quickstart
When prompted make sure to choose a sub directory rather than the root of your directory for generating the first target. We will add more targets in the following steps.
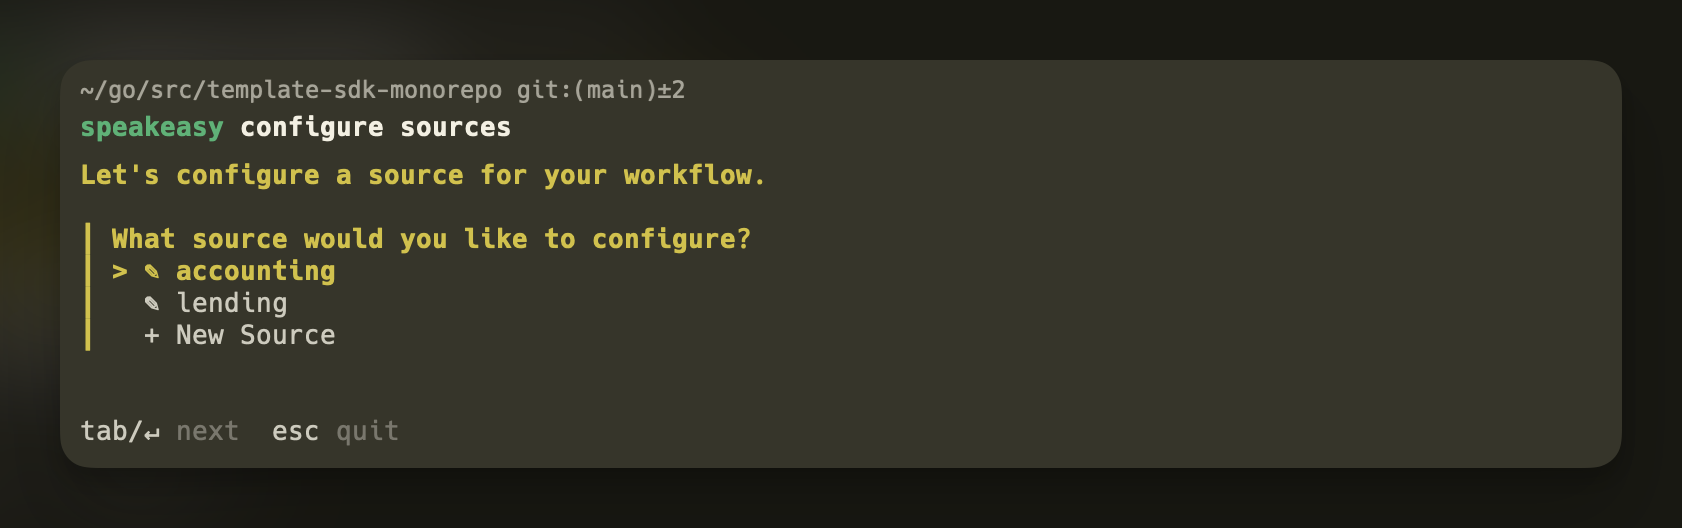
c. Configure your sources
speakeasy configure sources
For each source reference a local or remote OpenAPI document. Optionally add in an overlay if needed. Each source you configure here will be used to point towards a generation target in the following step.
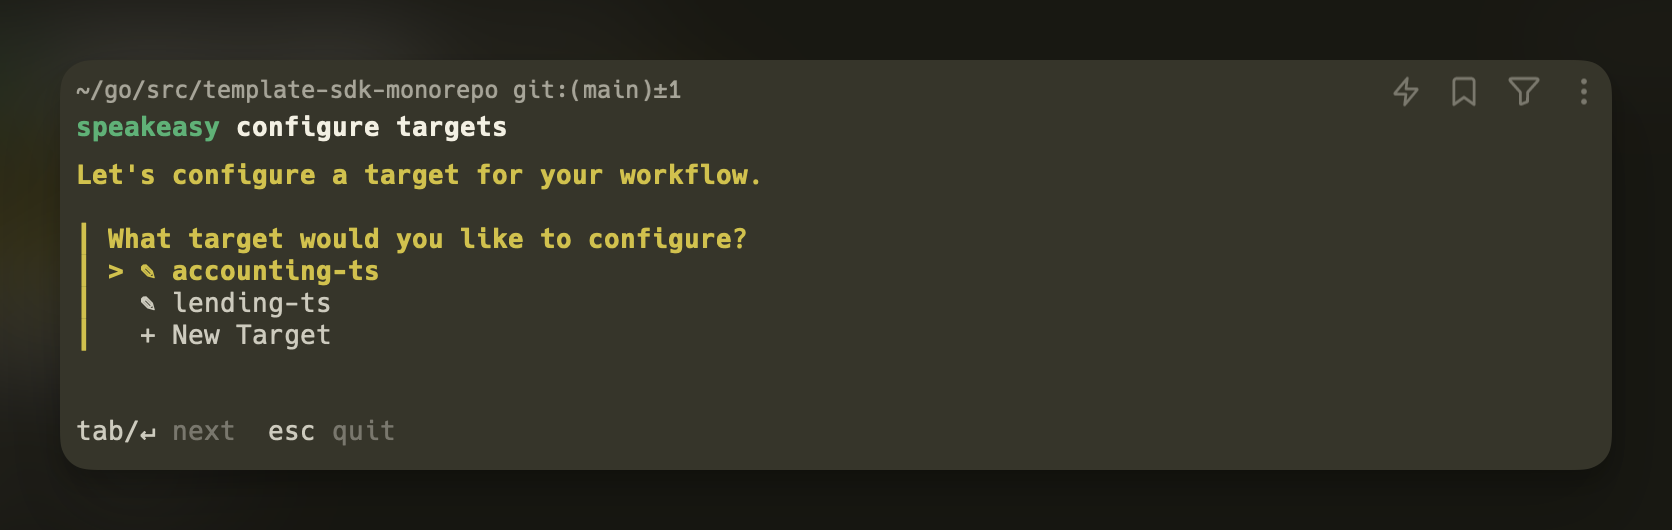
d. Configure your targets
For each target referenced a local or remote OpenAPI document. Optionally add in an overlay if needed. For ever target make sure to choose a
a language, a source and a subdirectory to generate the target in. In the provided example accounting and lending are two sub directories in which we'll generate two different targets for two different sources.
speakeasy configure targets
Final Speakeasy Workflow
The final speakeasy workflow file will look like the following
workflowVersion: 1.0.0speakeasyVersion: latestsources: accounting: inputs: - location: /path/to/accounting/openapi.yaml lending: inputs: - location: /path/to/lending/openapi.yamltargets: accounting-ts: target: typescript source: accounting output: ./accounting lending-ts: target: typescript source: lending output: ./lending
Setup Github Release and Publishing Workflows
Finally if you want your SDKs to be regenerated and published in their Github repos setup the workflow files needed for remote generation and publishing. The CLI can help you set up these files with:
speakesy configure publishing
Follow the prompts to setup your secrets in Github Action Secrets. Push up the repo to your remote location and watch everything spin!
Configure Generation
Edit the gen.yaml file in the root of each SDK's subfolder. This file dictates the generator settings, including package name, class names, parameter inlining, and other preferences. For complete documentation on all the available publishing configurations, see here.
Generate SDKs
Locally
Simply run speakeasy run and select the SDKs you wish to regenerate. Use speakaesy run --force if there are no OpenAPI document changes.

Github
To manually trigger SDK generation:
- Navigate to the Actions tab in your GitHub repository.
- Select the generation workflow for the SDK you wish to generate.
- Click "Run workflow" to start the generation process. Check mark the "Force" input option if there are no OpenAPI document changes.
Verify your SDK
After generation, review the SDK to ensure it aligns with your requirements.