Create Your SDK On GitHub
Learn how to automate the creation and publishing of SDKs from your OpenAPI specifications using Speakeasy's GitHub workflows.
Prerequisites
- A GitHub account and a repository for your SDKs.
- Your API specification in OpenAPI format, hosted publicly or in your GitHub repo.
- The Speakeasy CLI installed on your machine.
Step-by-Step guide
1. Initalize SDK Repository
Create a new GitHub repository to host the autogenerated SDKs. We recommend a separate repo for each SDK for simplicity, but a monorepo is also supported.
2. Generate SDK Workflow Configuration
Run the Speakeasy CLI to configure your SDK generation workflow. This command initializes the configuration process, creating necessary workflow files.
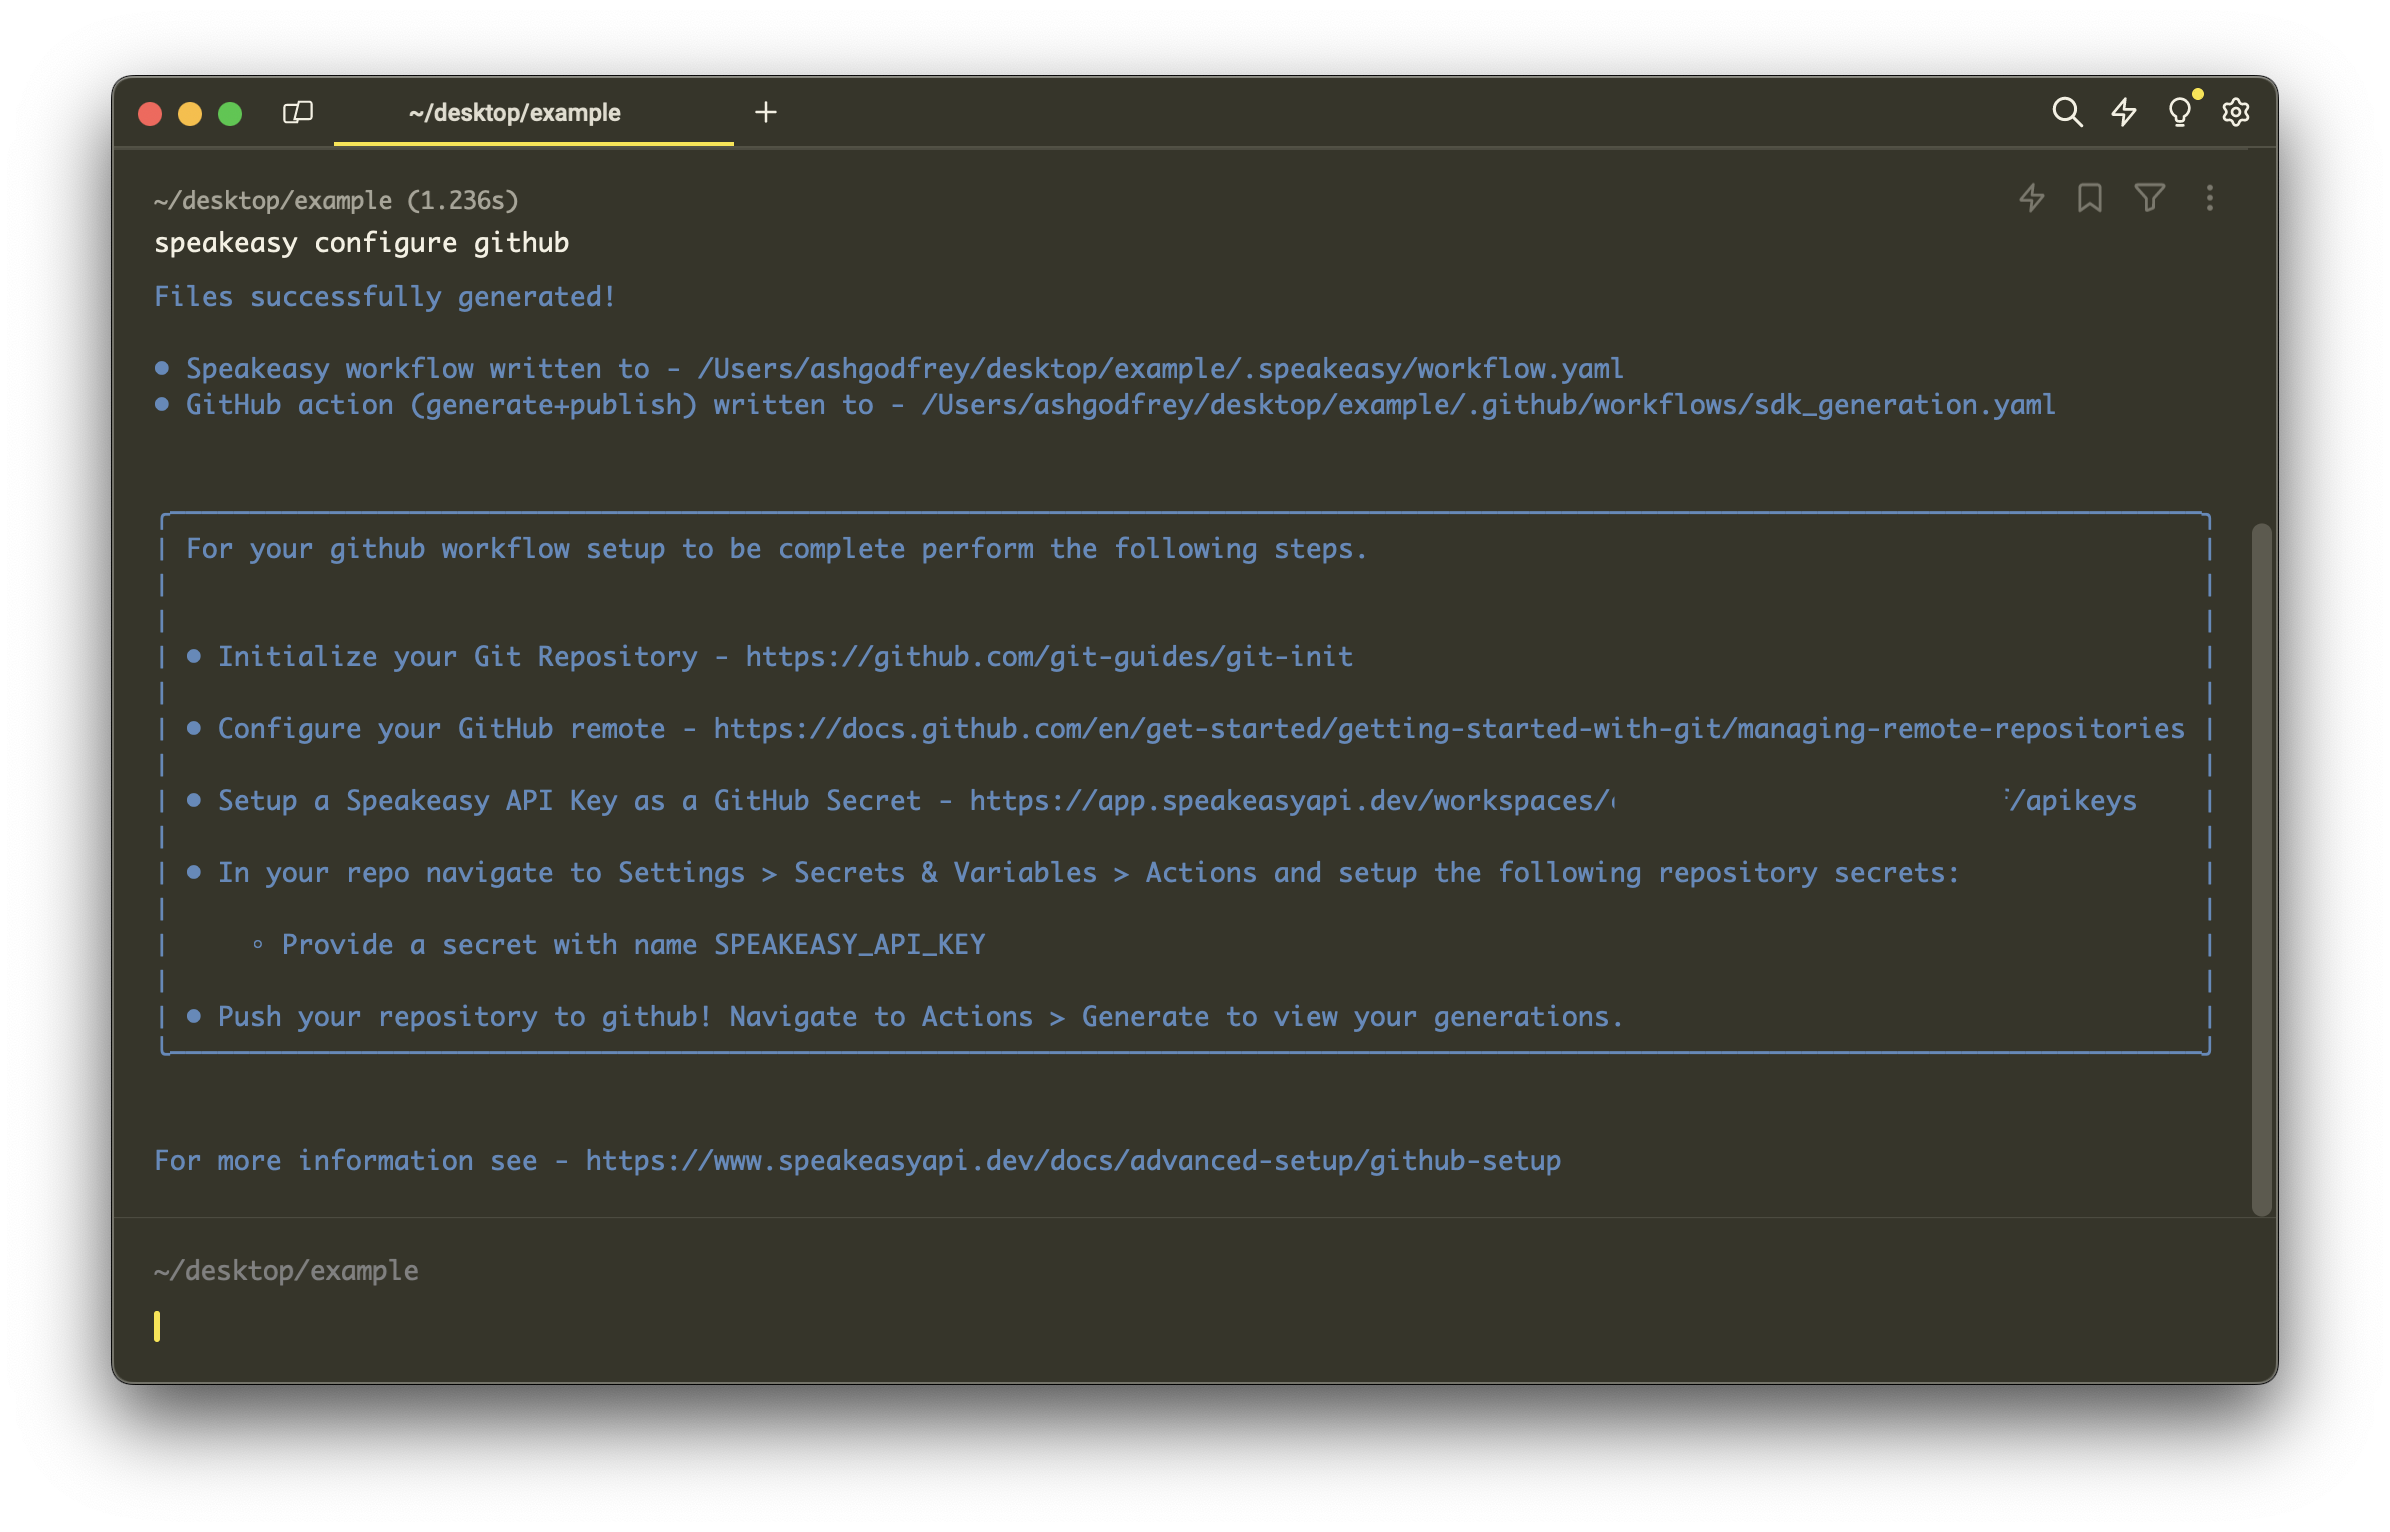
speakeasy configure github
After successfully running this command, you will see messages indicating the creation of .speakeasy/workflow.yaml and .github/workflows/sdk_generation.yaml. These files define your SDK generation workflow and the associated GitHub Action, respectively.
3. Setup Github Secrets
Configure the necessary GitHub secrets for authentication:
- Navigate to Settings > Secrets & Variables > Actions in your GitHub repo. If you don't have access to this tab in the Github UI please reach out to your Github organisational owner to grant you repository ownership permissions (opens in a new tab).
- Add a new secret named
SPEAKEASY_API_KEY, obtainable from the link provided in your terminal.
4. Push to Github
Commit and push the generated workflow files to your GitHub repository.
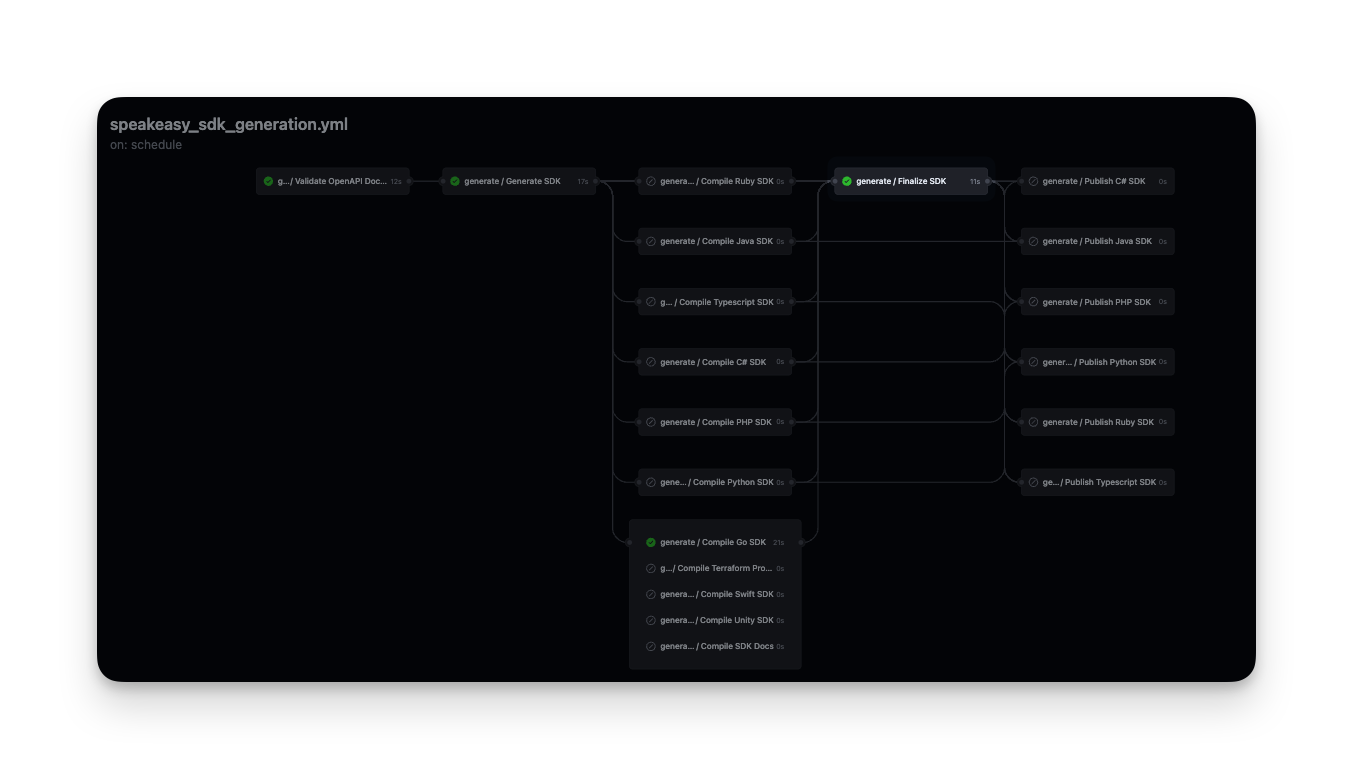
Navigate to Actions in your GitHub repo to manually trigger the SDK generation workflow or wait for it to run automatically. You will know the action worked if you see a green checkmark next to each workflow run, and it progresses all the way through the generate step. The publishing step will be skipped if you haven't setup package publishing.
For information on publishing, see here
5. Github Actions workflow permissions
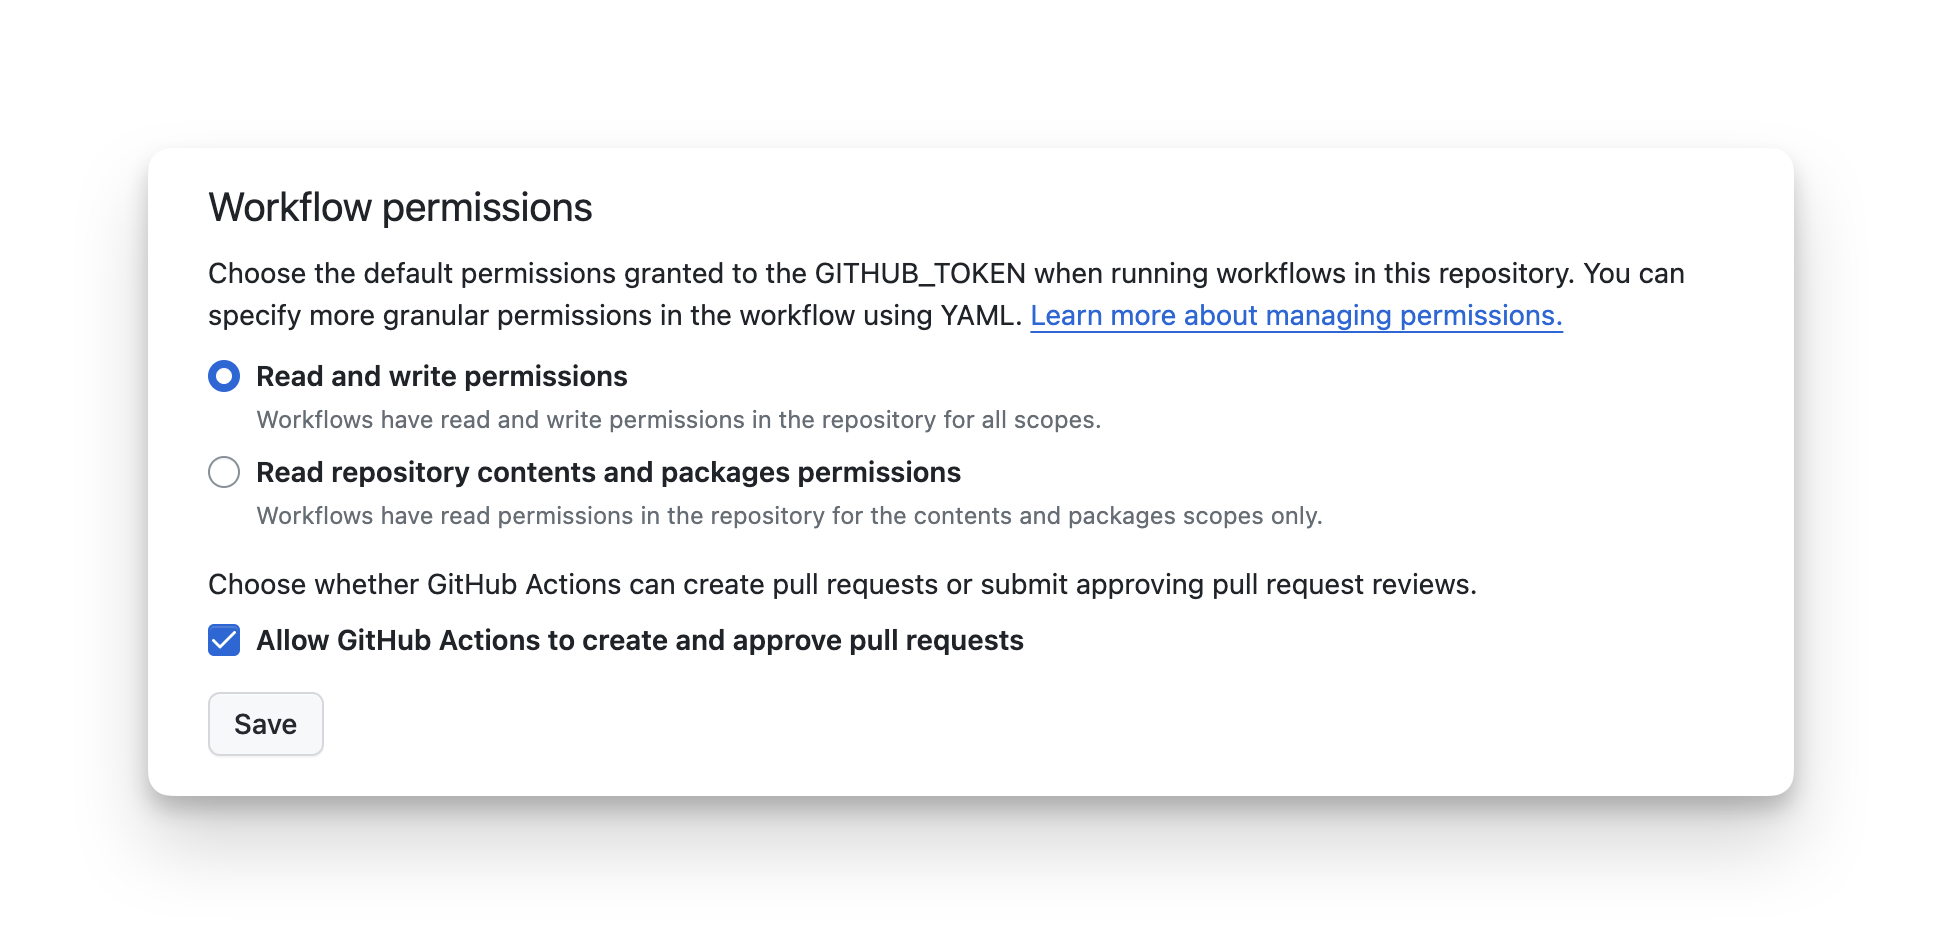
If you see an error messsage like the following 403 GitHub Actions is not permitted to create or approve pull requests. [] during generation you likely to need to update the Github actions permissions for your repository.
Navigate to Settings > Actions > Workflow permissions in your GitHub repo and set the following.
Configuring remote URLs for schemas
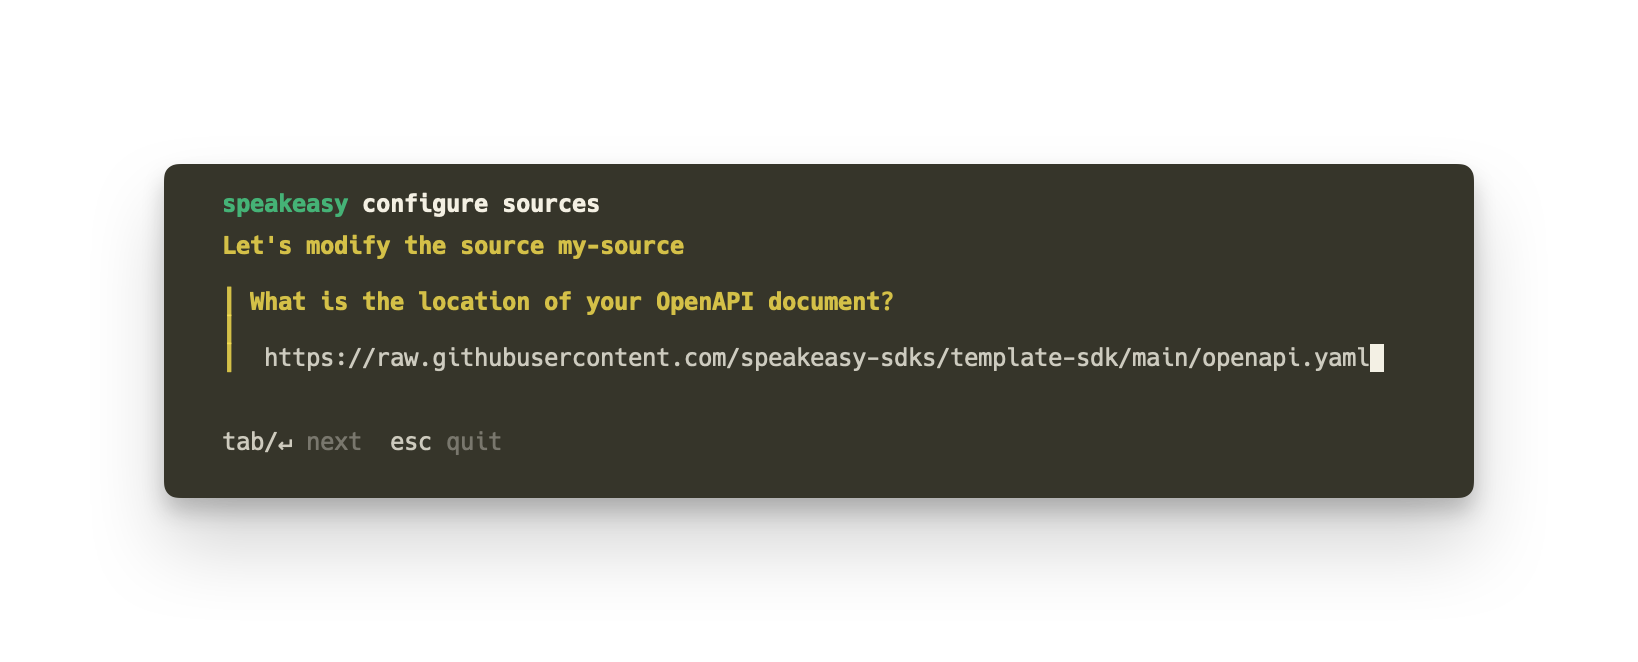
If your OpenAPI schema is hosted in a different repository or remote URL, you can configure the location of your source as a remote URL in the .speakeasy/workflow.yaml file. To so run speakeasy configure sources and follow the prompts to add in a remote URL for a source location.
Next if the schema is hosted at a remote URL make sure to provide a token or key to authenticate with the remote URL. Its reccomended to provide this as an environment variable(eg: $OPENAPI_DOC_TOKEN) instead of hardocding it into your workflow file. This limits exposure of the key and accidental checks in to Github.
When setting up the repository on Github make sure to add a Github Secret (opens in a new tab) with with the same name and value as the token/key to authenticate with your remote URL.
WARN
If you are using a remote URL for your OpenAPI schema, ensure that the URL is stable. Speakeasy does not currently support dynamically constructed URLs in its workflow files.